Common Spreadsheets Use Cases
Eggs: Starting Points for Your Birds
In Blackbird, Eggs are the seeds or blueprints for your workflows. They represent the initial ideas that have the potential to become fully-fledged Birds.
In this Egg-guide, let’s explore some common use cases around spreadsheets using Google Sheets, Microsoft Excel or Airtable. Find Downloadable Eggs under the examples - download JSON workflows to import into your Nest, add your connections, make any desired adjustments, and fly.
Use cases
Logging and Reporting
Spreadsheets can be a powerful tool to capture key data points at various stages of a workflow. Not only to be used as internal logs, but also sending workflow information to an external spreadsheet offers enhanced visibility and potential integration with dashboard tools for real-time analytics.
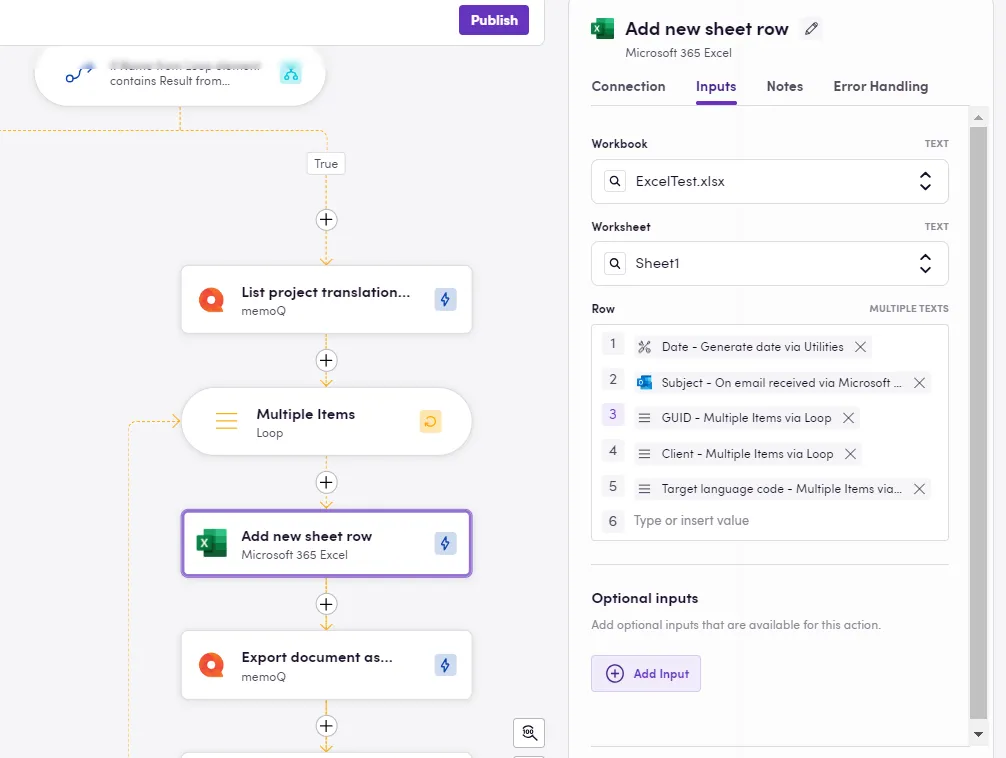
The Add new sheet row action in Blackbird is ideal for this purpose. It appends a new row at the end of the spreadsheet’s used range and allows multiple data points to be passed into consecutive cells, maintaining the order you specify in Blackbird. It will also check if there are rows available (Google Sheets) and add one in case we are at the spreadsheet’s end.
Searching and Updating Information
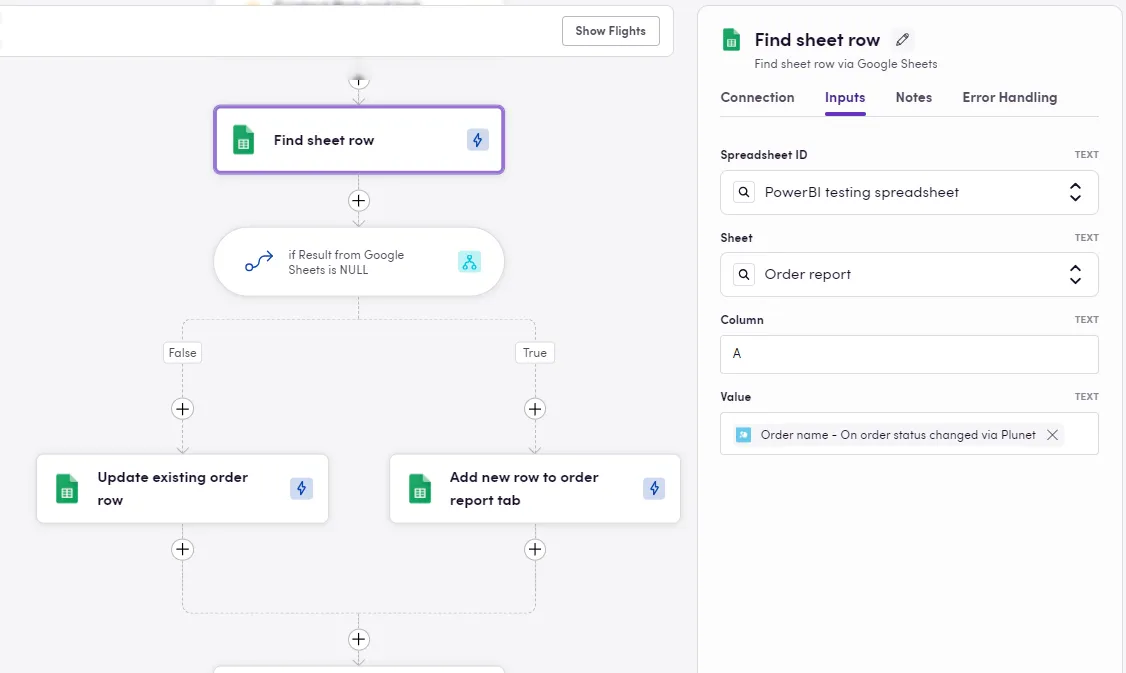
Managing dynamic data in spreadsheets often involves searching for and updating specific information. The Find sheet row action searches for a specified value within a designated column and returns the row number where the value was found (or null if not found).
Example: You may have a column in your table with unique order IDs. Every time an update occurs, you want to log these changes (maybe a status update) in your spreadsheet, use the Find sheet row action to locate the relevant row for that particular order, and subsequent actions like Update sheet row or Update sheet cell will allow you to modify information —such as the order status— in a different column but corresponding row.
This action can also be paired with a decision point to check if the unique value already exists in the spreadsheet. If the output is null, you can add a new entry; otherwise, update the existing one.
The same can be done in Airtable. The image below shows a Bird tha starts whenever a project status has been updated in Bureau Works, then the ID of the updated project is used as unique identifier in a column and we get the row information back by using the Search record action. Then, we update the correct cell with the new status for the corresponding project. Keeping my project information up to date.
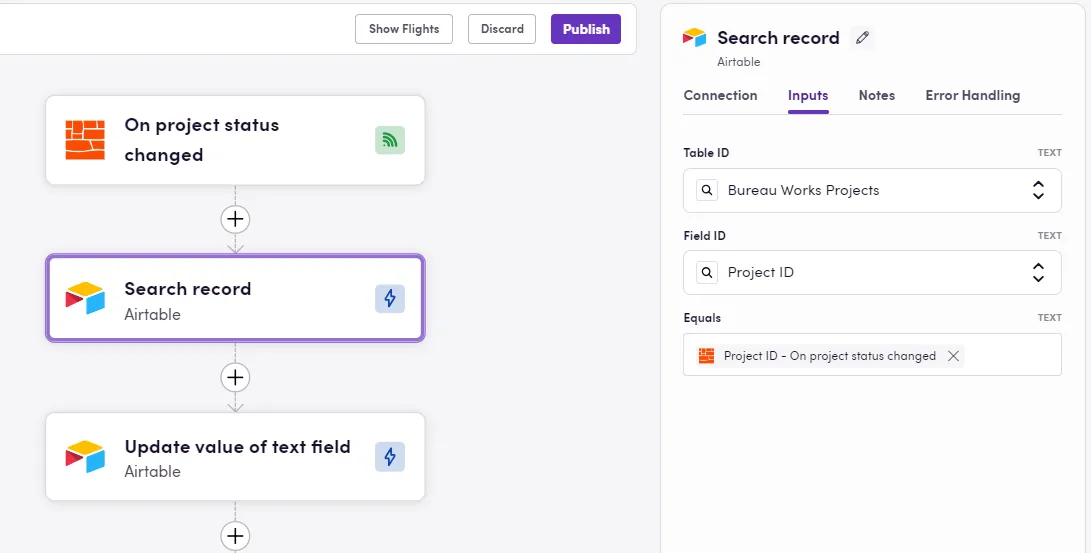
- Download Egg: Airtable Search record
Iterating Through Spreadsheet Rows
Many times workflows require to process data from a spreadsheet by iterating through its rows, either to extract data or to perform some processing and updates. In Blackbird, there are several ways you can loop through each row in a spreadsheet’s used range (or a subset), retrieve data from multiple columns, and add new data to these same rows.
Iterating Using a Generated Range:
If you already know the rows or subset of rows you want to work with, you can generate a range and iterate through it, using each number in the range as row number.
- Use the
Generate rangeaction in the Utilities app and input start and end numbers. E.g. inputing 2 as start and 5 as end will return [2,3,4,5]. - Add a loop to iterate through the range, using the loop output as the current row number.
- Inside the loop, use the
Get sheet cellaction to retrieve data by composing the cell address (combining the known column with the current row number from the loop). - After processing the extracted data, use the
Update sheet cellaction to add your result, or mark the row as processed.
- Download Egg: Microsoft Excel Generate Range
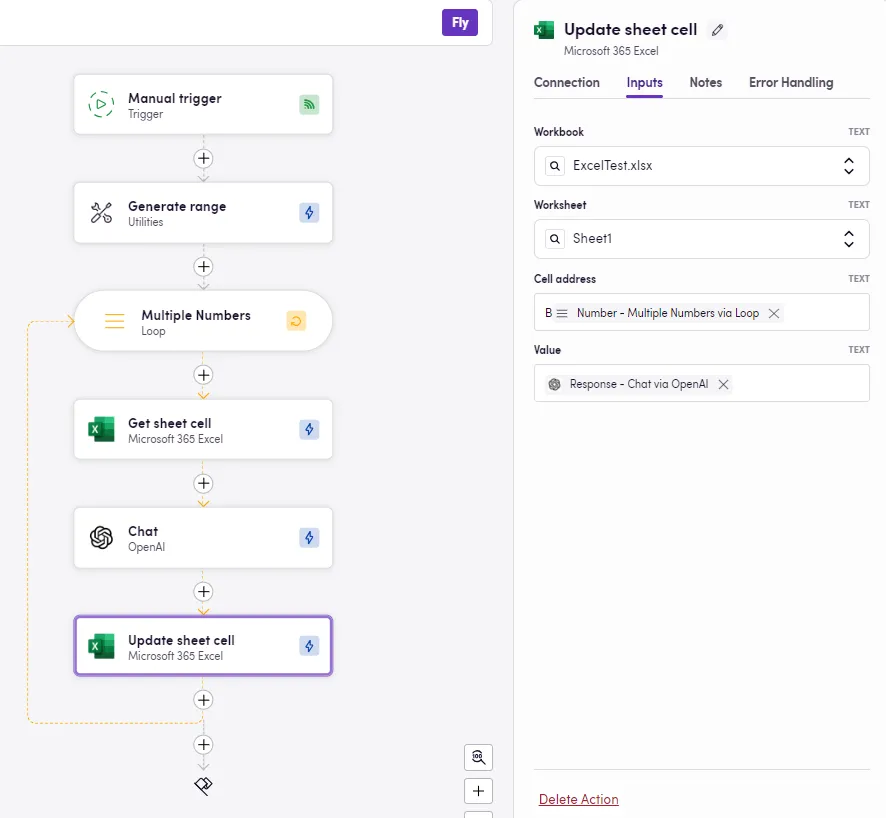
In a very similar fashion, when the number of rows in the spreadsheet is unknown, you can dynamically get the used range to get the total number of rows in the spreadsheet.
- Use the
Get used rangeaction to retrieve the total number of rows. - Generate a range based on the Row count output or use the Row IDs output directly as input for the loop.
- As with the previous approach, loop through the rows, retrieve and process data with
Get sheet cell, and then update or mark each row viaUpdate sheet cell.
Note that you can input 2 as the start row for your range generation in case you want to spare the spreadsheet headers.
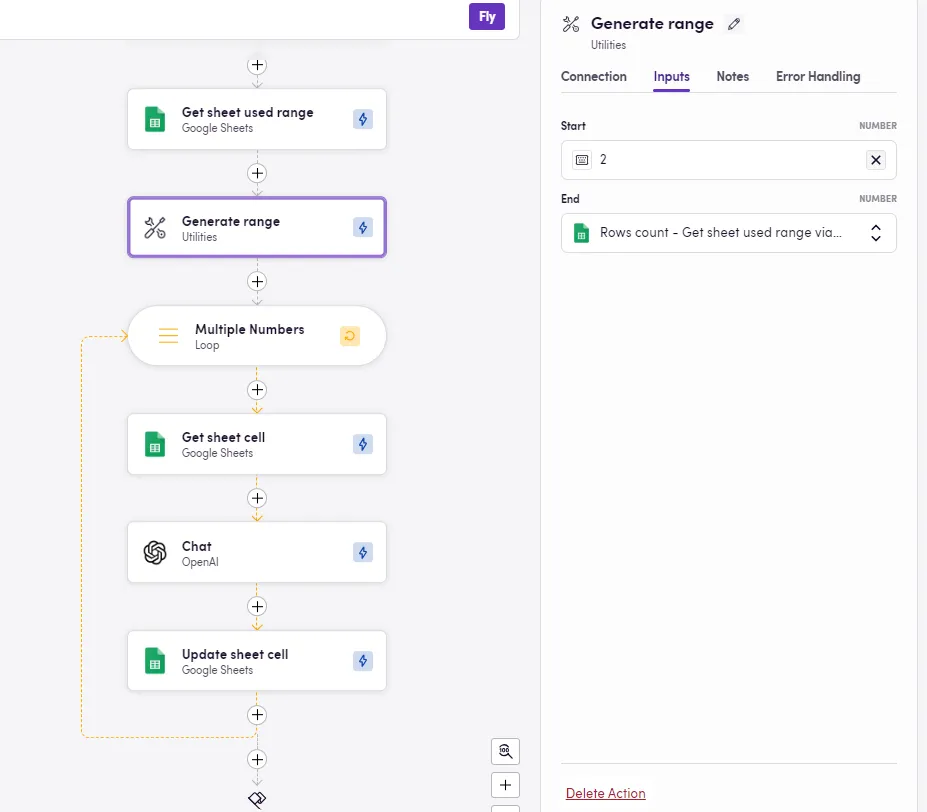
- Download Egg: Google Sheets Generate Range
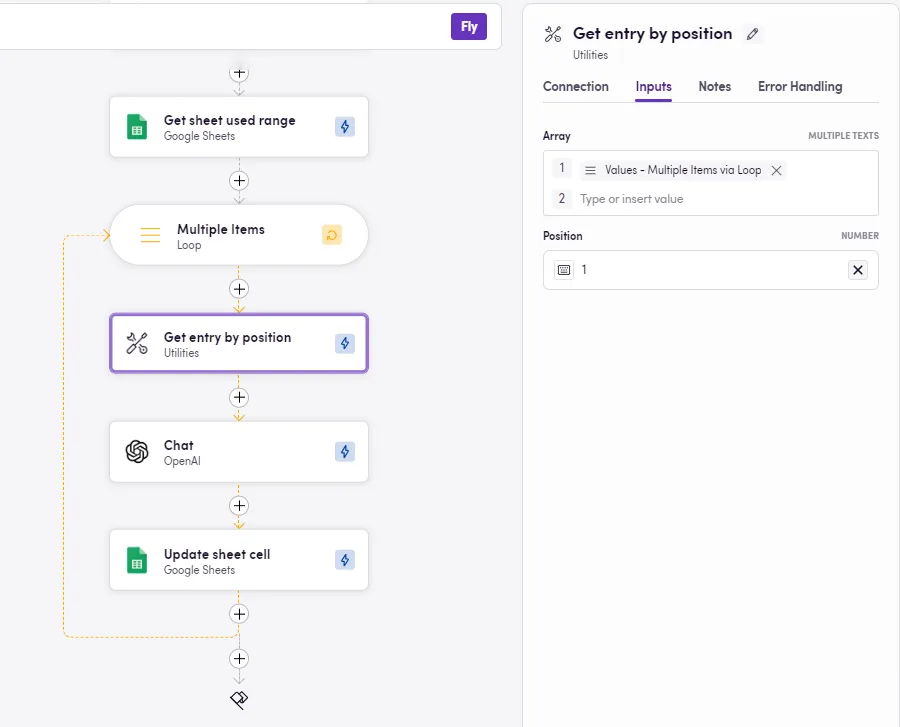
Iterating Through Rows Using Arrays:
If you need to extract multiple values from each row, treating each row as an array of cell values can simplify the process. This approach is also more efficient as it entails making fewer API calls.
- Use either
Get used rangeorGet rangeto retrieve a set (or subset) of rows as arrays of cell values. - Add a loop with the actual Rows output as input.
- Use the
Get entry by positionaction from the Utilities app to extract specific column values based on their position in the array (e.g., position 3 for column C). - After you have processed the data, you can
Update sheet cellby composing the cell address (using Row ID from the loop and specifying the column)
Another variant, using a subset and multiple column entries as input for other actions:
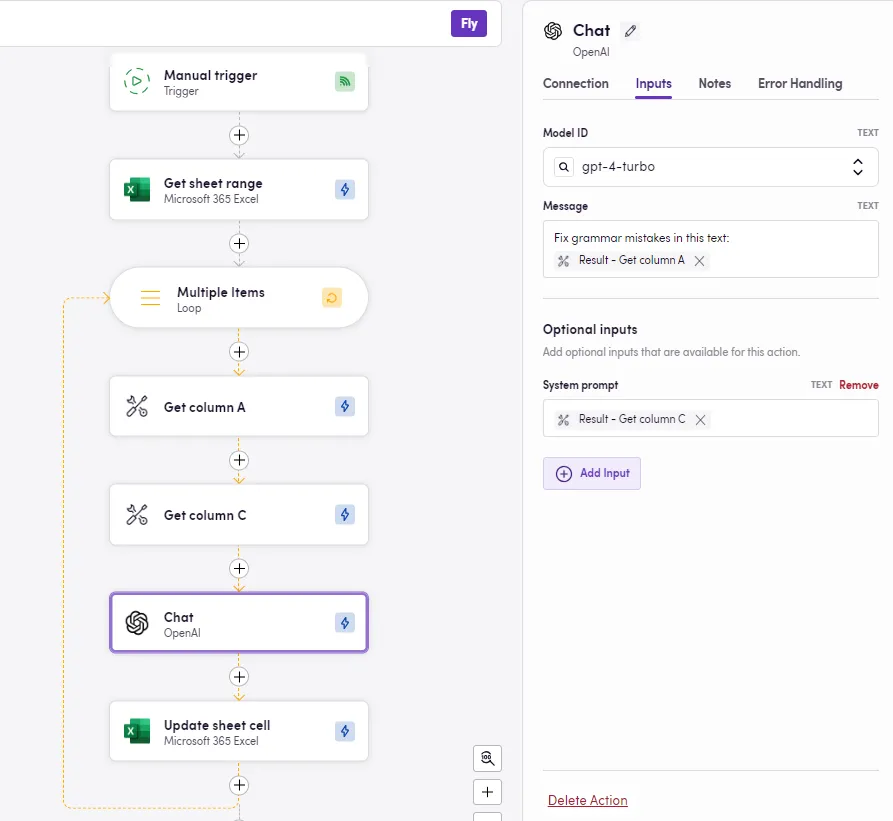
- Download Egg: Google Sheets Iterate through Range
- Download Egg: Microsoft Excel Generate Range
Getting or Updating Column Values in Bulk
In some workflows, it might be necessary to handle bulk updates or retrieve multiple values from a single column in a spreadsheet. There are some specific actions available that will save time by processing entire columns at once, instead of doing it row by row.
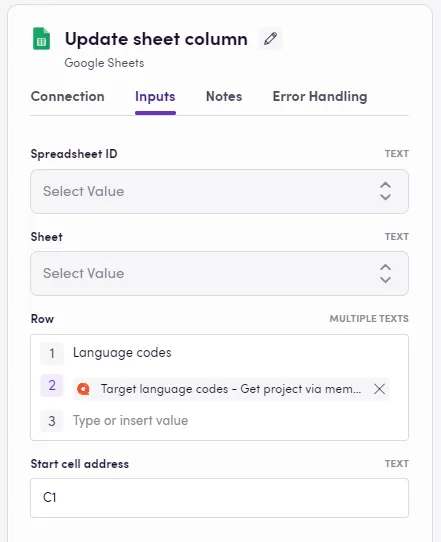
Update Sheet Column
When you have a list or array of values (e.g., target language codes or file names) that you want to populate in a spreadsheet column, the Update sheet column action makes it easy. This action can take as input one or more arrays and/or a group of single values. These will be written into the spreadsheet’s specified column one value below the other starting in the provided cell address and respecting the same order as they were listed in the action’s input.
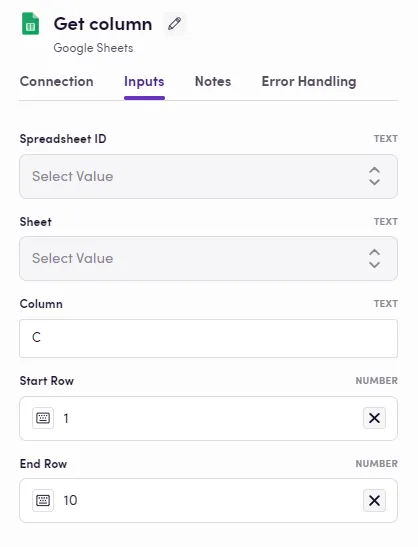
Get Sheet Column
Similarly, you might need to retrieve a set of values from a specific column for later use. Use the Get column action to specify the column (e.g., column C) and the start and end cells (e.g., 1 to 10). The output will be an array containing the values from the specified column range that you can later use as input for the subsequent steps.
Importing Eggs
To import an Egg into your Nest:
- Navigate to the Bird Editor section.
- Click on Import on the top right.
- Select the Egg (JSON) file to import and click
Import. - Identify the newly created Bird and click on it to edit it.
- Update the Connection details and any other needed input/output parameters or desired steps. Look for red warning signs next to the step name signaling missing details in said step.
- Click Save/Publish.