Setting Up a Blackbird Project
Use your favorite IDE to create a .NET class library to start your project. Then, install our SDK using NuGet. You can find a link to our SDK here or search ‘Blackbird’ in the NuGet package manager. This guide shows you the steps in Visual Studio 2022 for Windows. Alternatively, you can create a Blackbird app from a template.
Prerequisites
- Git installed on your local machine. For this tutorial we assume you have a basic understanding of Git (if starting from a template).
- Install Visual Studio for Windows with the .NET desktop development workload. You can download and install the 2022 Community edition for free, or use the Professional or Enterprise edition. Alternatively you can use any other .NET IDE environment like Rider or VS Code with the necessary plugins.
- .NET 8 (or higher) installed on your machine.
From scratch
Create a project
- In Visual Studio, select File > New > Project.
- In the Create a new project window, enter Class Library in the search box and select C# and in the dropdown lists. In the resulting list of project templates, select Class Library and then select Next.
- In the Configure your new project window, update the Project name and the Solution name, and then select Next.
- Select .NET 8.0 (or the latest version) for Framework in the Additional information window, then select Create.
Visual Studio creates the project, and it appears in the Solution Explorer.
Add the SDK
Depending on your project format, the installation of a NuGet package records the dependency in either your project file or a packages.config file. For more information, see Package consumption workflow.
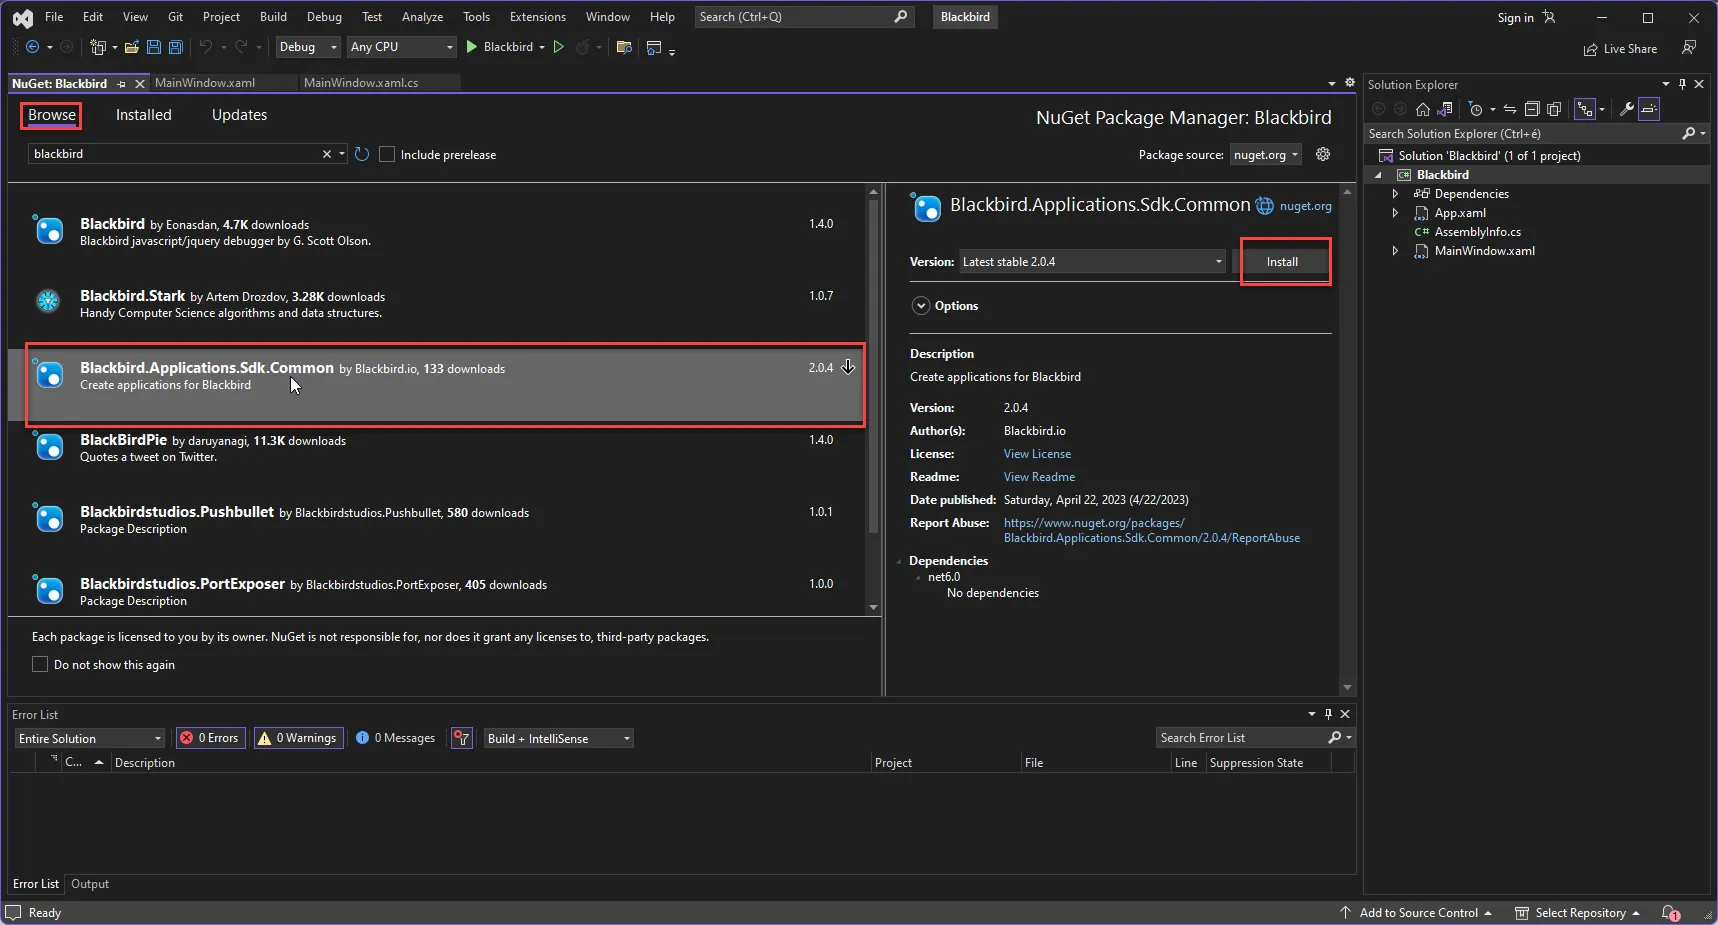
To use the NuGet Package Manager to install the Blackbird.Applications.Sdk.Common package in Visual Studio, follow these steps:
- Select Project > Manage NuGet Packages.
- On the NuGet Package Manager page, choose nuget.org as the Package source.
- From the Browse tab, search for Blackbird.Applications.Sdk.Common, select
Blackbird.Applications.Sdk.Commonin the list, and then select Install. - When you are prompted to verify the installation, select OK.

From a template
Clone the template app repository from the command line using:
git clone https://github.com/bb-io/TemplateApp.gitOpen the solution file and explore the project
Cloning from an existing app
Clone the repository of the app you want to modify. You can find all Blackbird’s repositories here.
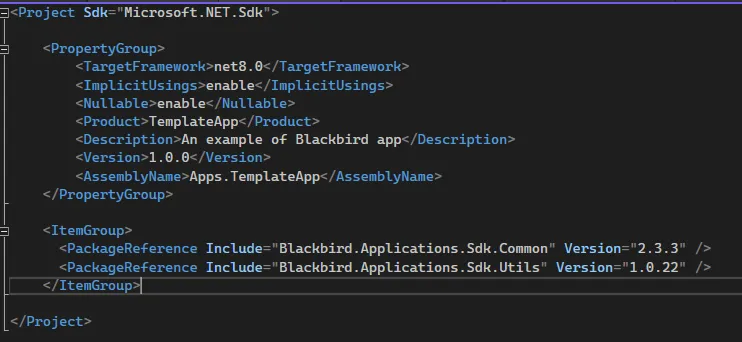
When deploying your modifications, you do so in a custom app. Please see the deployment guide. Note that you also need to change the Product and the AssemblyName variables in the metadata strcuture. See below.
Metadata structure
Blackbird uses properties defined in the .csproj file to populate metadata fields. For most custom apps, only the Version and AssemblyName are relevant (the other properties are defined in the UI). When uploading a newer version of an existing app, make sure the version number is higher.
