Adobe Workfront
Adobe Workfront is a cloud-based work management solution designed to help teams and organizations efficiently plan, track, and manage their work. It streamlines project management, task collaboration, resource management, and portfolio management across various teams and departments. Additionally, it serves as a leader in enterprise work management, enabling teams to connect, collaborate, and simplify workflows to deliver personalized experiences at scale. With features that support large enterprises, Adobe Workfront helps in building a centralized marketing system of record.
Before setting up
Before you connect to Adobe Workfront, make sure you have the following:
- An active Adobe Workfront account with sufficient permissions to create projects, tasks, and users.
- Your Workfront instance must be web-accessible from the Blackbird platform (e.g., no restrictive firewall blocking access).
- Your Workfront domain (base URL). This is usually in the form:
https://yourdomain.my.workfront.com - An OAuth2 application created inside Workfront. The OAuth2 application will provide you with a Client ID and Client Secret, which are required to set up the connection in Blackbird.
To create an OAuth2 application in Workfront:
- Log in to your Workfront instance.
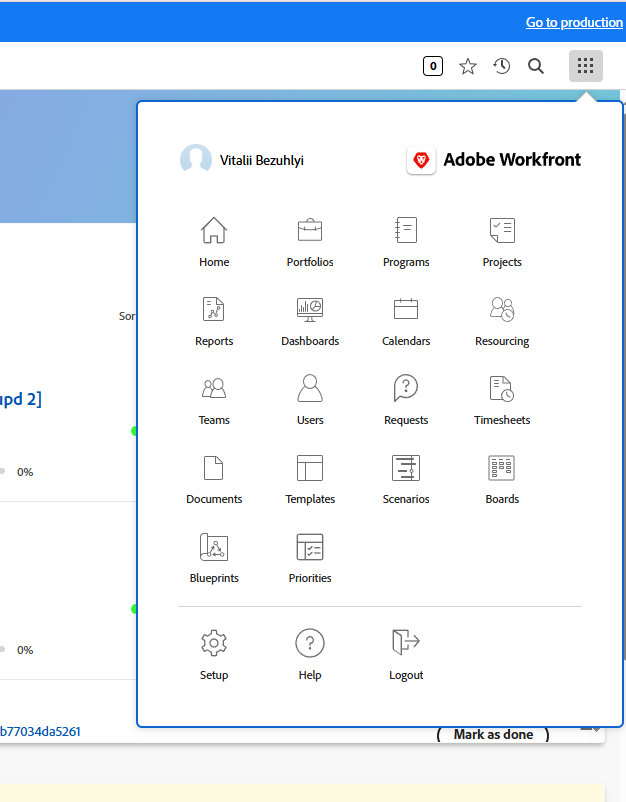
- In the top-right corner, click the grid icon (the square of dots) and select Setup.
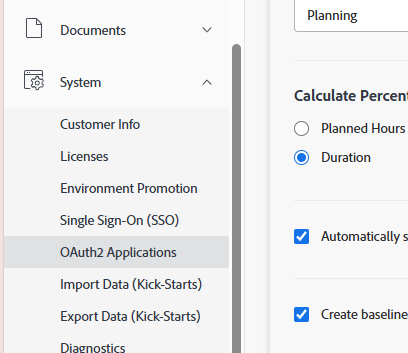
- In the left-side menu, expand System and select OAuth2 Applications.
- Click Create app integration.
- In the New OAuth2 application dialog, select Web Application as the authentication method.
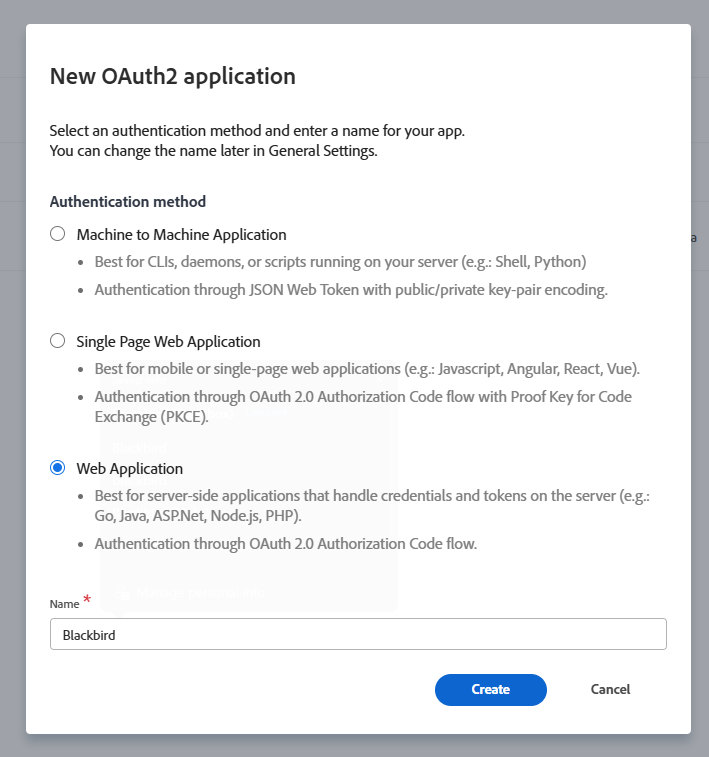
- Enter a name for the application (e.g., Blackbird).
- In the Redirect URIs section, add the following URI:
https://bridge.blackbird.io/api/AuthorizationCode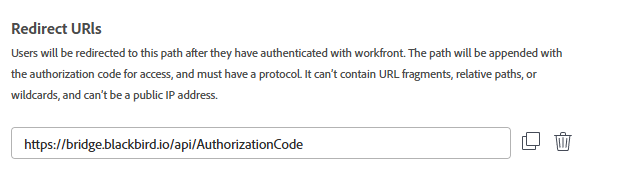
- Adjust token expiration settings according to your needs
- Add client secret by clicking on Add client secret button.
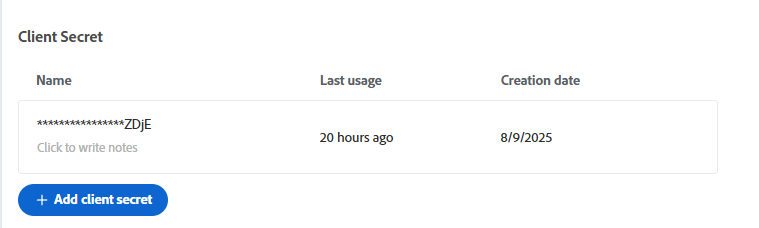
- After creation, copy your Client ID and Client Secret.
⚠️ Important: The Client Secret is only shown once. Store it securely. If lost, you will need to generate a new secret by editing or recreating the app.
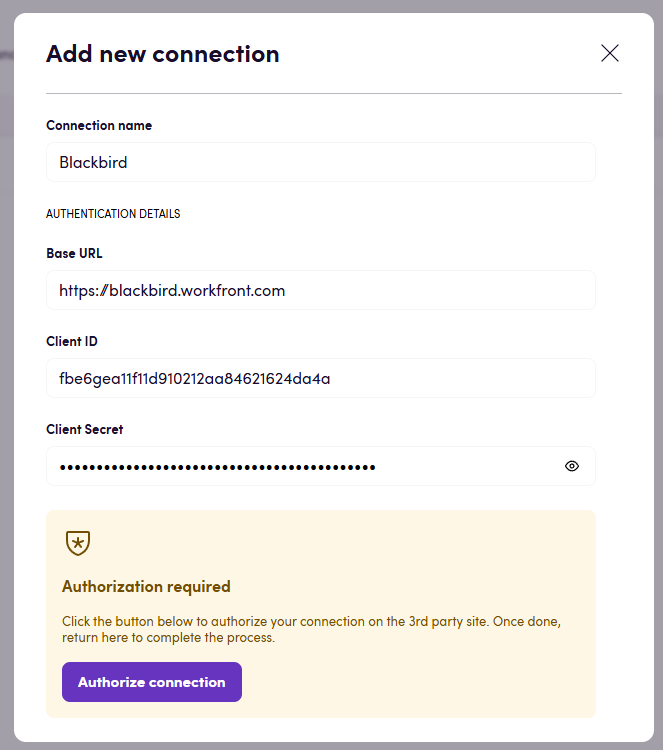
Once you have your Base URL, Client ID, and Client Secret, you are ready to set up the connection in Blackbird.
Connecting
-
Navigate to Apps in Blackbird and search for Adobe Workfront.
-
Click Add Connection.
-
Name your connection for future reference, e.g., My Workfront.
-
Fill in the following fields:
-
Base URL: Your Workfront instance URL.
Example:https://your-adobe-workfront-domain.com -
Client ID: The Client ID you obtained when creating your OAuth2 application in Workfront.
-
Client Secret: The Client Secret you obtained when creating your OAuth2 application in Workfront.
⚠️ Important: This value is shown only once during app creation in Workfront. Make sure you have stored it securely.
-
-
Click Connect.
-
Confirm that the connection has appeared and the status is Connected.
Actions
Projects
- Search projects: Returns a list of projects based on specified criteria.
- Get project: Retrieves details of a project by its ID.
- Create project: Creates a new project with the provided details.
- Update project: Updates an existing project with new details.
- Delete project: Deletes a project by its ID.
Tasks
- Search tasks: Returns a list of tasks based on specified criteria.
- Get task: Retrieves details of a task by its ID.
- Create task: Creates a new task and optionally assigns users.
- Update task: Updates an existing task and optionally reassigns users.
- Delete task: Deletes a task by its ID.
Documents
- Upload file: Uploads a file and attaches it to a task or project.
- Download document: Downloads a document by its ID.
Custom fields
- Get string custom field value: Returns the value of a custom field for a specific object.
- Set string custom field value: Updates the value of a custom field for a specific object.
Events
Projects
- On project created: Triggered when a new project is created.
- On project changed: Triggered when any property of a project changes.
- On project status changed: Triggered when a project’s status changes.
Tasks
- On task created: Triggered when a new task is created.
- On task changed: Triggered when any property of a task changes.
- On task status changed: Triggered when a task’s status changes.
Documents
- On document uploaded: Triggered when a new document is uploaded.
Example
Here’s an example of how to set up a support workflow with Slack and Adobe Workfront that will automatically create a Workfront task from a client request in Slack and then return the response back to the client in Slack once the task is completed.
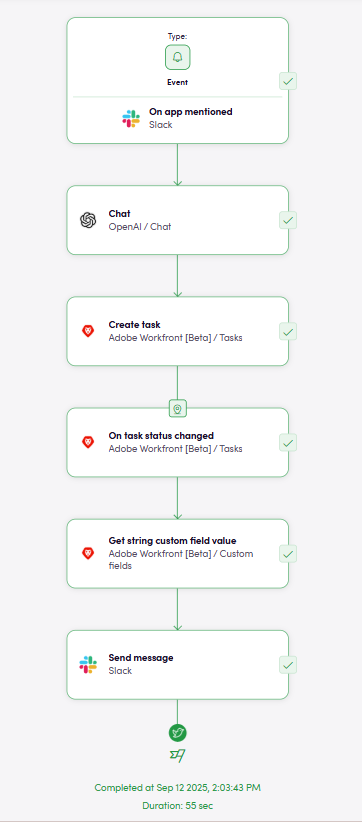
- The workflow starts with the
On app mentionedevent in Slack. When a client mentions the app in Slack with a request, the event is triggered. - The
Chataction with OpenAI is used to process the client’s message and generate a suitable task title. - The
Create taskaction in Adobe Workfront creates a new task using the generated title. - The
On task status changedevent in Adobe Workfront monitors the status of the created task. When the task is marked as completed, the flow continues. - The
Get string custom field valueaction retrieves the content of a custom field called Answer to client from the completed task. - Finally, the
Send messageaction in Slack sends the value of Answer to client back to the original Slack thread, providing the client with the requested response.
Feedback
Do you want to use this app or do you have feedback on our implementation? Reach out to us using the established channels or create an issue.