
Microsoft Teams Bot
Microsoft 365 Teams is a collaborative communication platform that combines chat, video conferencing and file sharing. This app lets Blackbird participate in Teams conversations as a bot: it sends and replies to messages under its own identity rather than on behalf of a signed-in user.
Before setting up
Section titled “Before setting up”Before you can connect you need to make sure that you have a Microsoft 365 account.
You also need to install the Blackbird bot in Microsoft Teams.
Downloadblackbird-teams-bot.zip from this link, then:
- In Teams, go to Apps (the + icon in the left sidebar) → Manage your apps → Upload an app → Upload a custom app.
- Select the downloaded
.zipfile. - Use the Add dropdown to choose Add to a team or Add to a chat and select every team or chat where the bot should send messages.
Note: If Upload a custom app isn’t shown, your Teams administrator has disabled custom app uploads. Ask them to enable it or to upload the package for your whole organization via Teams admin center → Teams apps → Manage apps → Upload new app.
The bot can only post to conversations it belongs to.
Custom Azure app
Section titled “Custom Azure app”If you want to use a custom Azure application for authorization, you should do the following:
- Go to Azure → App registrations → New registration.
- Enter the name of your application and choose the supported account types. Click Register.
- Go to Manage → API permissions and select the required scopes:
- If you don’t need to manage channel messages, select the following: offline_access User.Read User.ReadBasic.All Team.ReadBasic.All Channel.ReadBasic.All Chat.Read Files.Read.All Files.ReadWrite.
- If you need to manage channel messages, select the above permissions + the ChannelMessage.Read.All scope.
- Go to Manage → Authentication and click Add a platform. Choose Web and enter this redirect URI: https://bridge.blackbird.io/api/AuthorizationCode
- Go to Manage → Certificates & secrets and click New client secret. Enter a description (optional) and set the expiration time. Copy the created secret value, as you won’t be able to see it again.
- Go to Overview and copy the Application (client) ID and Directory (tenant) ID. Use these values to register your connection in Blackbird.
Connecting
Section titled “Connecting”OAuth2
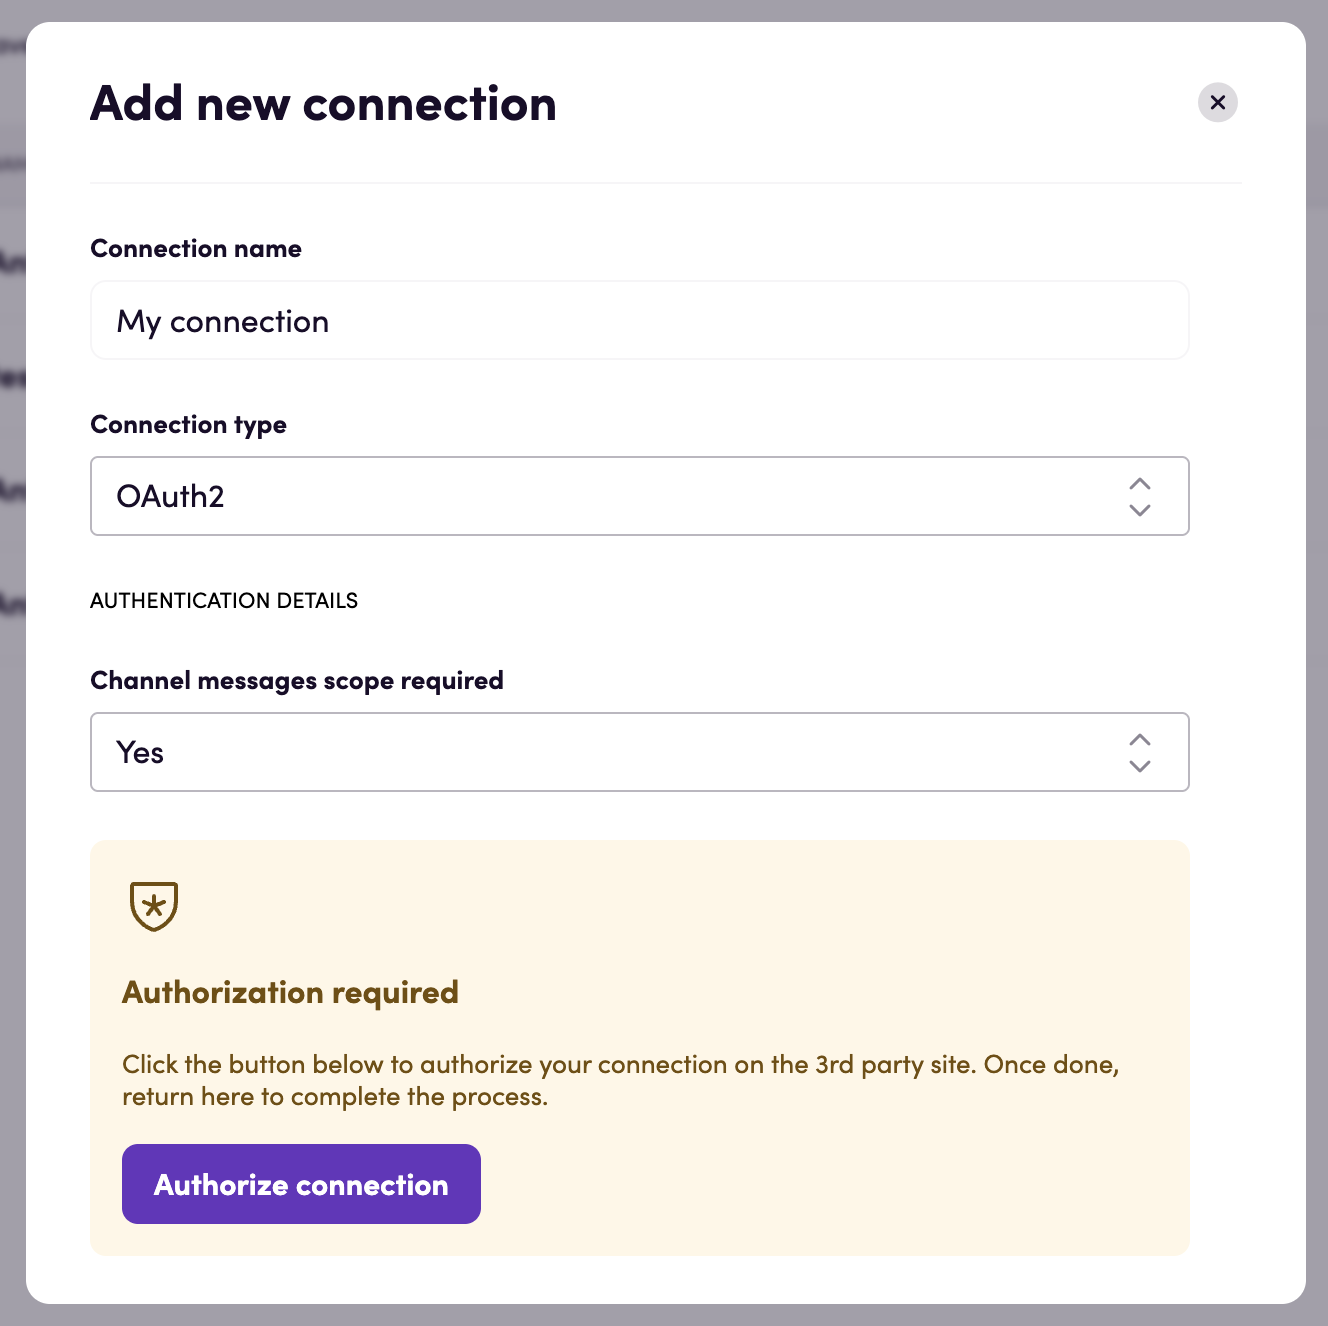
Section titled “OAuth2”- Under Channel messages scope required specify Yes if you want to use webhooks and/or actions for channel messages and No if not.
- Click Authorize connection.
- Follow the instructions that Microsoft gives you, authorizing Blackbird.io to act on your behalf.
- When you return to Blackbird, confirm that the connection has appeared and the status is Connected.
OAuth2 (Azure app)
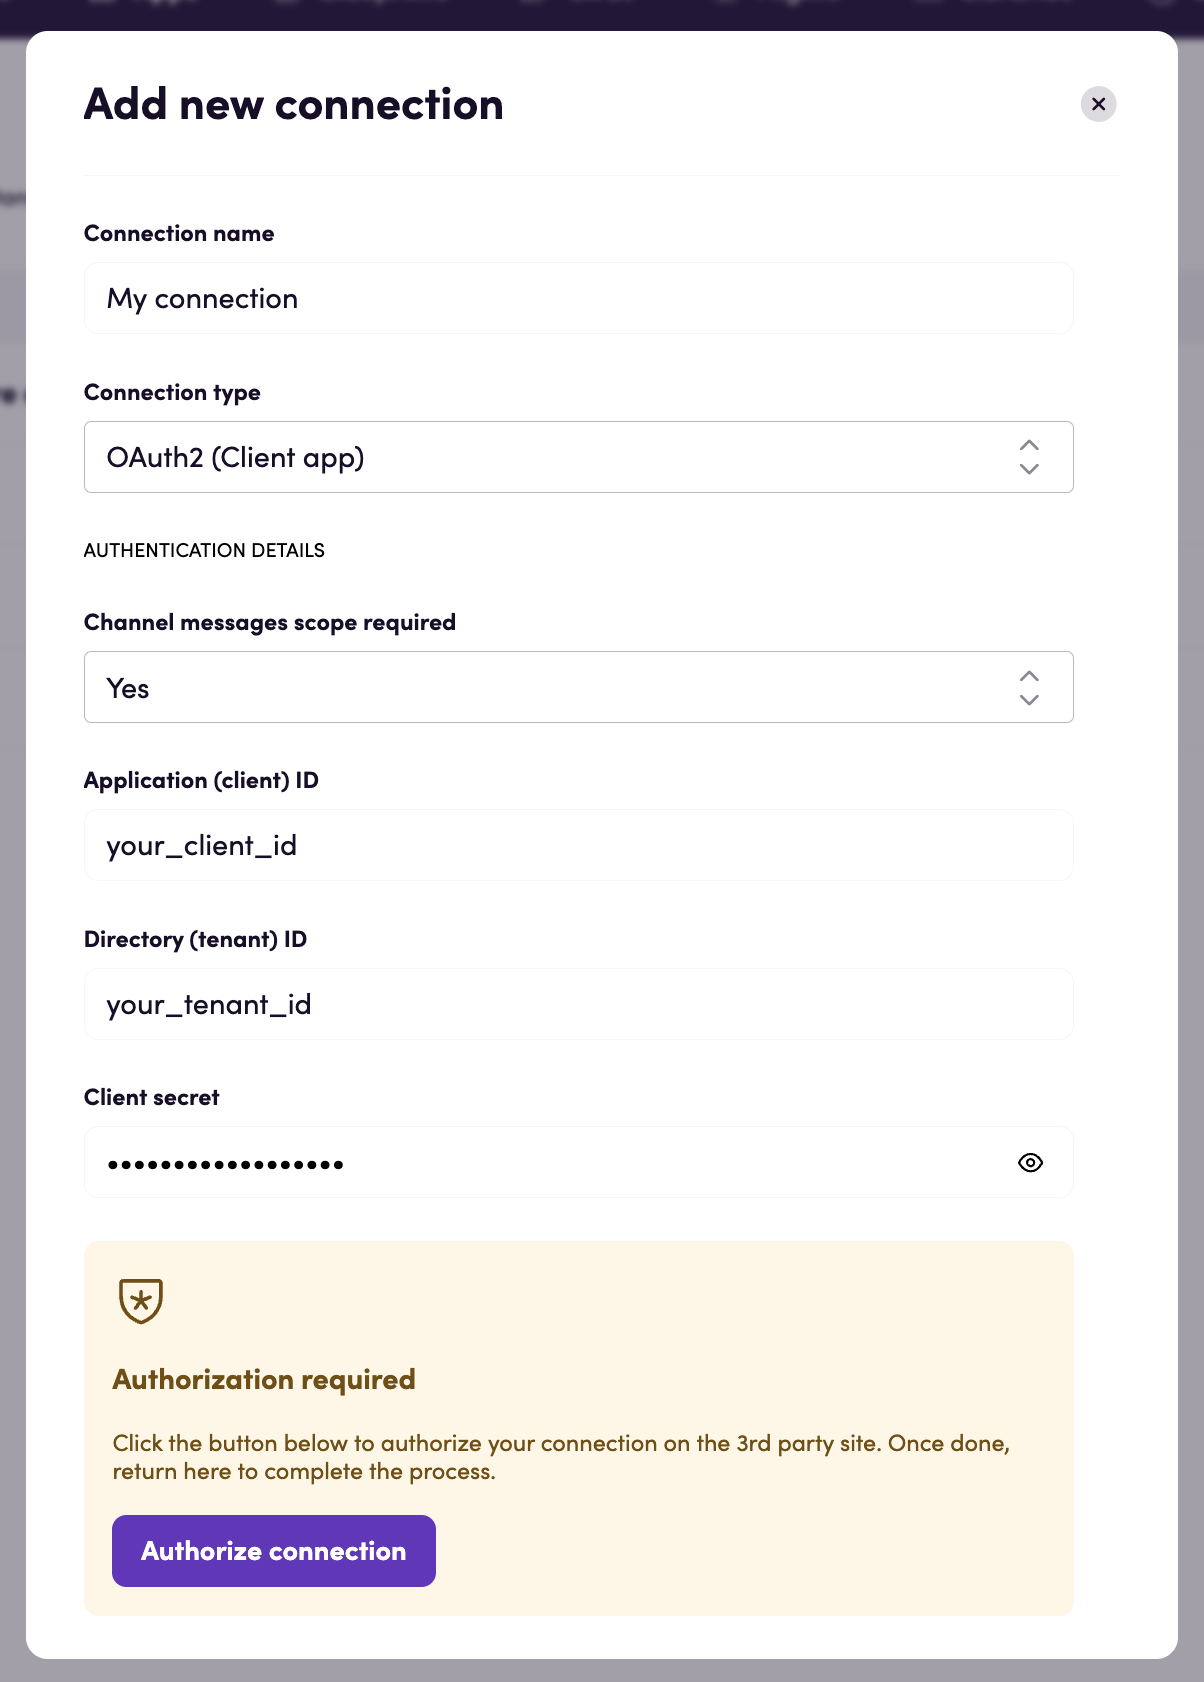
Section titled “OAuth2 (Azure app)”- Under Channel messages scope required specify Yes if you want to use webhooks and/or actions for channel messages and No if not.
- Enter the Application (client) ID, Directory (tenant) ID and Client secret obtained from your custom Azure app.
- Follow the instructions that Microsoft gives you, authorizing Blackbird.io to act on your behalf.
- When you return to Blackbird, confirm that the connection has appeared and the status is Connected.
Actions
Section titled “Actions”Note: Every action requires a Bot service url. Map the Service url output from an event when the action follows a trigger.
Channels
Section titled “Channels”- Reply to message in channel. Post a reply to an existing message in a channel
- Send message to channel. Post a new message to the specified channel
- Download files attached to channel message. Download files attached to a channel message
- Reply to message in chat. Post a reply to an existing message in a chat
- Send message to chat. Post a new message to the specified chat
Events
Section titled “Events”Channels
Section titled “Channels”- On bot mentioned in channel
- On bot mentioned in chat
Feedback
Section titled “Feedback”Do you want to use this app or do you have feedback on our implementation? Reach out to us using the established channels or create an issue.